Laser Cut Name | How to Make Wooden Laser Cut Names
Hi Guys, hope everyone is doing well. It’s Tim from Create-A-Lase and today we are going to make a wedding laser cut names made out of MDF wood sheet. This is a great idea for seat planning and makes your wedding event more organized. You can also make these laser cut names as a souvenir to your guests. Keep on reading the article and we will show you how to easily make your very own laser-cut names.
Essence of wedding name cut outs or place cards
Congratulations! You are now on the dreaded part of your event which is seat planning. Figuring the seating arrangements for your guest can be really exhausting as you need to carefully think who will sit next to each other as we want everyone to be as comfortable and enjoy the rest of the day.
To make it as easy as possible for your guest to know their table you can create a seating chart or even just a simple fun wedding Laser Cut Names. By doing so, it will allow you to smoothly plan ahead of time. As soon as you have the name cutouts, you can group it all together to know who will occupy a certain seat and table.
So keep on reading the article as I will show you how you can easily make your own wedding laser cut names.
Before we start making our laser cut names, we need to prepare the things and tools we need
Materials you need:
- Laser Machine
- MDF Wood Sheet
- Wood Paint
- Painter’s or Masking Tape
- Paint Brush
- Glitter Spray or Top Coat Spray
- Sandpaper (optional)
Software used for the design:
- CorelDraw, though you can follow along with any vector program of choice.
Let’s Start Making our Laser Cut Names!
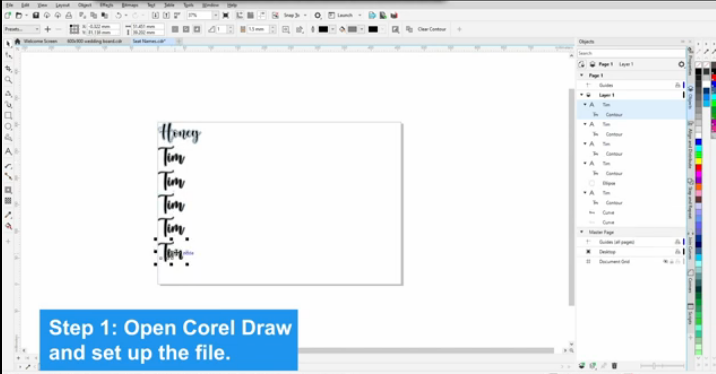
Step 1:
Open Corel Draw and set up the file.
Step 2:
Get the MDF wood sheet and painter’s tape then over the entire wood sheet first with the tape. This will help protect your wood from smoke and burnt marks around the parameter when the machine cuts. It will also serve as masking when you prefer to paint just the inner section of the names.

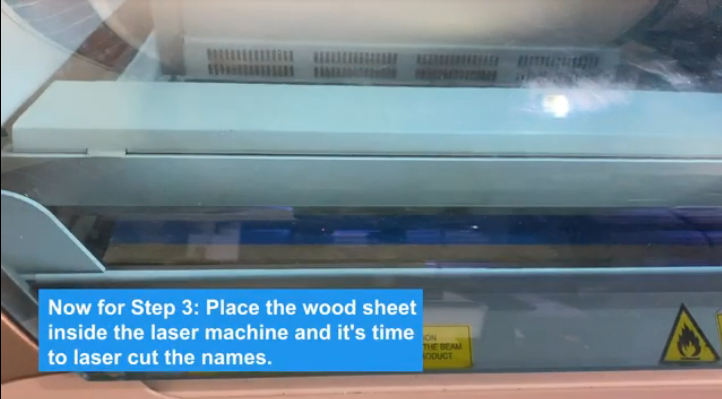
Now for Step 3:
Place the wood sheet inside the laser machine and it’s time to laser cut the names.
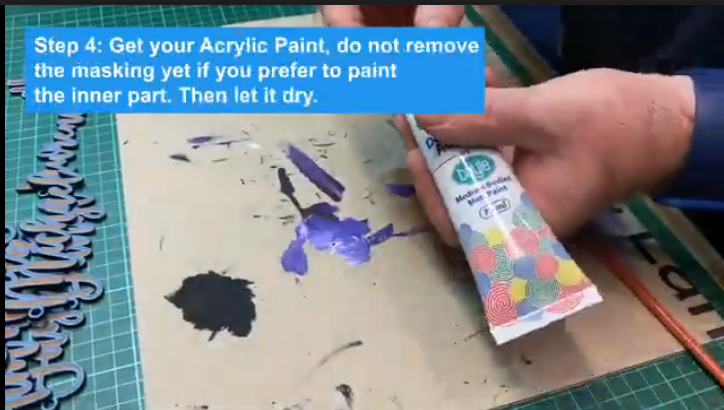
Step 4:
Get your Acrylic Paint, do not remove the masking yet if you prefer to paint the inner part. Then let it dry.
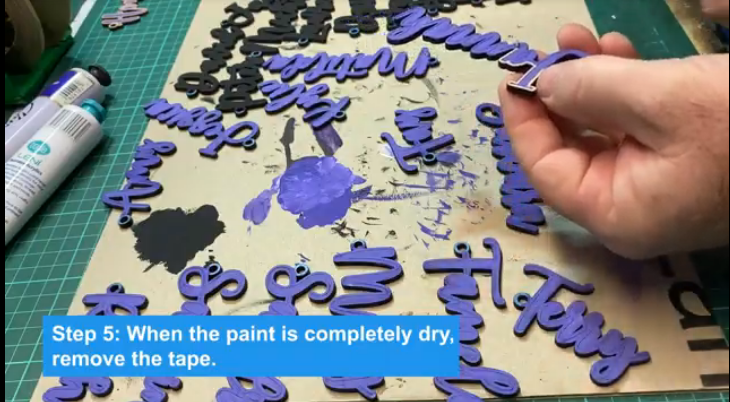
Step 5:
You can remove the tape when the paint is completely dry. Get a sandpaper and polish and smooth the surface, though you can also skip this part, depending on your preference.
-

Sandpaper -
Remove Tape
Lastly, for Step 6:
And for the final step, you can use a glitter spray to add a little bit of sparkle to the names or just a clear topcoat to seal everything together and for longevity. Don’t forget to check the details from front to back to make sure that everything looks good.
-
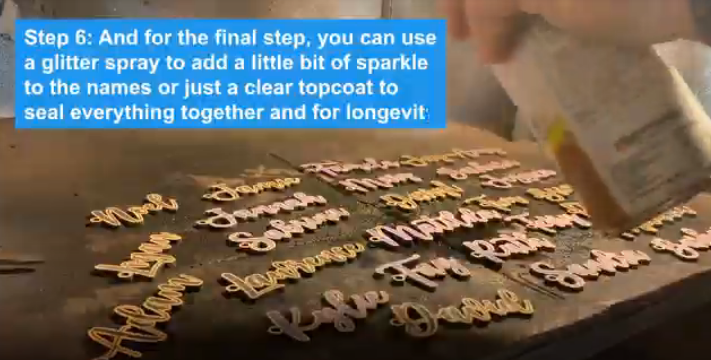
use a glitter spray to add a little bit of sparkle to the names
To wrap it up
Hope this article helps you create your very own wedding laser cut names and gives you some input and techniques on how to make one. It doesn’t require having the power tools, all you need to do is keep those creative juices flowing and we guarantee that the outcome will be as great as it is. You may share this video with anyone you know who loves to create things and DIYs, and they may help you make these beautiful wedding guest book that will surely leave a grand statement on your wedding day.
——
Visit our Youtube channel to watch the video on how we made this beautiful
LINK: https://youtu.be/NLGvvhzBW0Y
Please also check out our previous article titled: MAKING A WEDDING SIGN
——