Hi Guys, it’s Tim from Create-A-Lase and today we are going to make a wedding guest book cover made out of a wood sheet. This beautiful wedding guest book is perfect for keeping special memories of your wedding or any event, it has very intricate design wood markings. Keep on reading the article and we will show you how to make your very own wedding guest book.
Purpose of Wedding Guest Book
A wedding guest book has somehow become a wedding tradition. It is a staple detail for us to keep track of the people who attended our special day. In today’s modern era a lot of styles are being put up when it comes to a wedding guest book. You can either use a traditional album style, or make it more unique by cutting out wooden hearts then let your guests stick it to a readily available wooden sheet. Ultimately, the decision is up to you whether to have a wedding guestbook or not.
But today, I will teach you how to make a very simple yet elegant laser engraved wedding guest book. And somehow, give you some ideas if you should consider having one for your special event. Keep on reading until the end for the step-by-step tutorial. Thank you
Before we start making a laser engraved wedding guest book, we need to prepare the things and tools we need.
Materials you need:
- Laser Machine
- Wood Sheet
- Wood Stain or Wood Paint
- Painter’s or Masking Tape
- Paint Brush
Software used for the design:
- CorelDraw, though you can follow along with any vector program of choice.
Let’s Start Making our Wedding Guest Book!
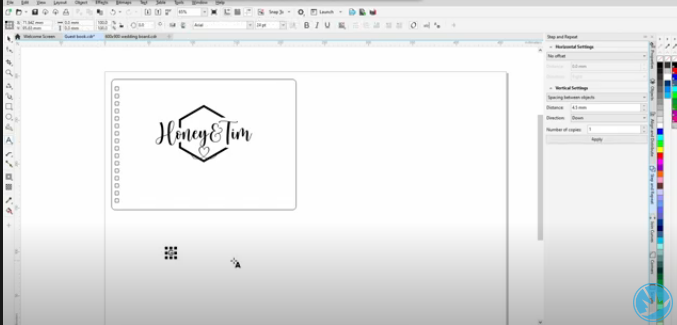
Step 1: Open CorelDraw: Or use any vector-based software like Illustrator or Inkscape to set up the file.
Step 2: Prepare the wood sheet and painter’s tape. Using the hardcover of the sketchbook, mark off the measurement to make sure you will have the exact size to cover the entire guest book.
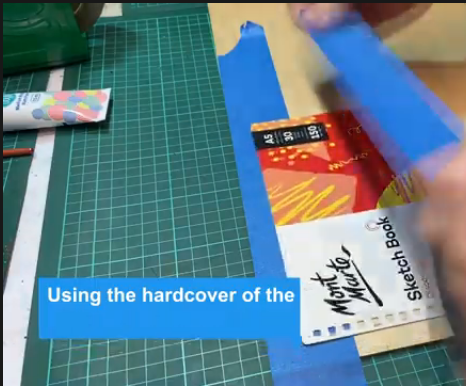
When the measurement is all good, get the painter’s tape and cover the entire surface. This will help protect your wood around the engraving area from smoke and burnt marks. It will serve as masking too when you prefer to paint the inside part of the design.
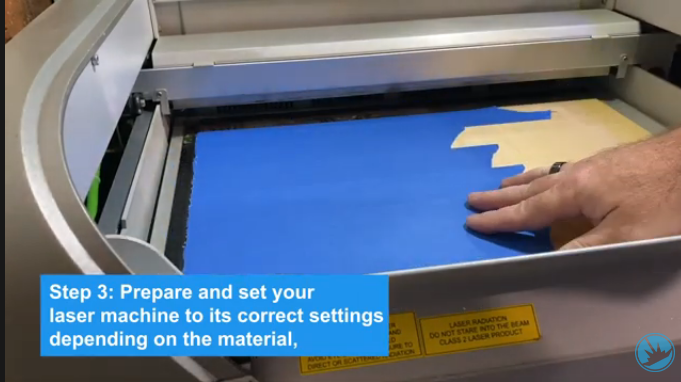
Step 3: Prepare and set your laser machine to its correct settings depending on the material, for today we are using a Rayjet Engraver.
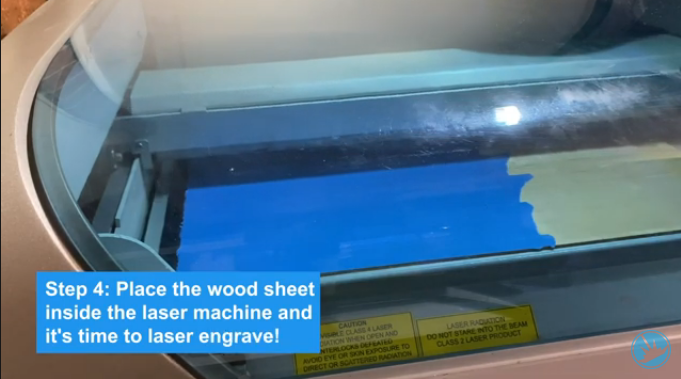
Step 4: Place the wood sheet inside the laser machine and it’s time to laser engrave!
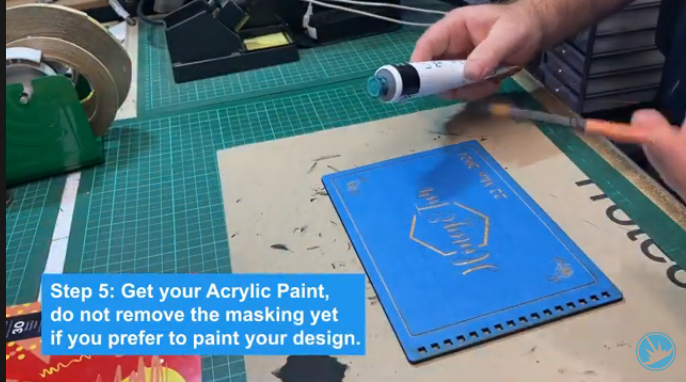
Next is Step 5: Use the Acrylic Paint, do not remove the masking yet if you prefer to color your design. Then let it dry.
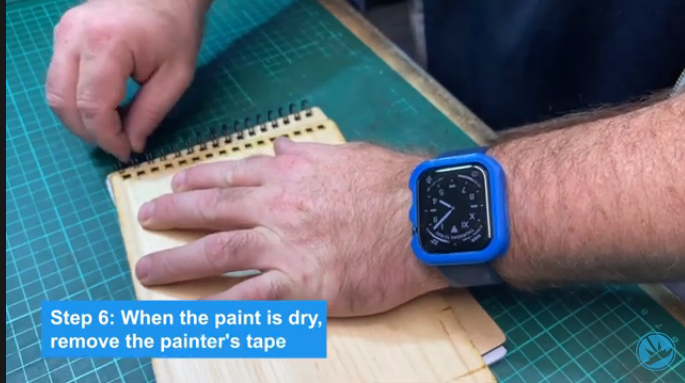
Finally for Step 6: When the paint is dry, remove the painter’s tape and grab all the cut out wood sheets and attach them to the sketchbook. Don’t forget to check all the details to make sure that your guestbook looks good.
To wrap it up
Hope this article helps you in creating your customized Laser engraved wedding guestbook and gives you some input and techniques on how to make one. It doesn’t require you to have the power tools, all you need to do is keep those creative juices flowing and we guarantee that the outcome will be as great as it is. Don’t forget to share this video with anyone you know who loves to create things and DIYs, and they may help you make these beautiful wedding guestbook that will surely leave a grand statement on your wedding day.
——
You may also check out our previous article titled How To: Making A Wedding Sign
——
Visit or follow us through our social media platforms below:
http://facebook.com/createalase